Howl At The Moon - Free Pattern and Instructions
Howl At The Moon is a cute applique project that will be great for the fall season. It has a big Harvest Moon at the focal point with fall leaves around it. It works through Halloween and beyond. Its a fun project with just a few supplies.
About the Designer: Marsh Thomas
She is new to designing for My Favorite Quilt Store but and experienced quilter. She loves to make her own patterns and try new techniques. By day she is an ICU Nurse taking care of patients but at night she turns into an Art Quilter. She is very talented and has shared some of her other works on art with us on Instagram. Howl at the Moon was inspired by October and the beautiful weather we look forward to here in the South.
Supplies Needed:
FABRIC: DARK BASE FABRIC – 32 tall x 22 wide LEAVES – 2 Fat Quarters of different Fall colors for 22 leaves TREE BRANCHES – brown scraps or 1/2 Fat Quarter MOON – 1 Fat Quarter for 9 inch circle BORDERS – ½ yd of fabric BACKING – 1 yd of fabric BINDING – ½ yd of fabric BATTING – 40 tall x 30 wide
Applique Supplies are not listed in detail because you can use your favorite method of Applique. Hand applique or Fusible Applique work with this project.
Hand Applique you will need to cut an additional 1/4" around each shape when cutting it out of the fabric. You will need hand sewing needles and matching thread.
Fusible Applique you will need. A Fusible Web (Steam a seam, Wonder under or any fusible that is lightweight, You will need a marker to trace shapes on the back of your fusible. You will need an applique pressing sheet.
Choosing Your Fabric:
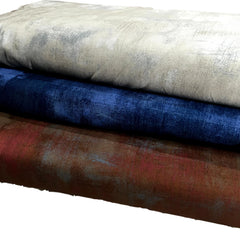
You can use scraps and fabrics from your stash. In the sample, we used grunge fabrics by Moda for the background and some of the elements in the wall hanging. The leaves we used island batik fabrics in oranges, yellows, and golds.

When you are ready to stitch down your applique here is how we pin basted our piece to do the stitching. You stitch and quilt it at the same time. When it is pin basted the first stitch in the ditch around your outer border to secure to make sure it stays square.

Here is the full-size picture of the wall hanging pin basted. Stitch around the blue background between the background and the purple border to make sure it says square. You can use a matching navy thread or monopoly thread which every you feel more comfortable with.
 Close up picture of it pin basted. After you have the stitched in the ditch you should start with the larger elements first to stitch down. Like the moon and then the branches. Use matching thread to the fabric used to coordinate or lighter shades to create depth. Free motion quilt the branches in straight lines and them make sure you go around each leaf to secure them also.
 Here is a picture of the leaves quilted.
This is a free digital pattern. Click here and add it to the cart, then checkout to download it.
We hope you enjoy this art quilt. Please send us pictures of your creations. Most importantly, have fun making this project!
Happy Quilting!